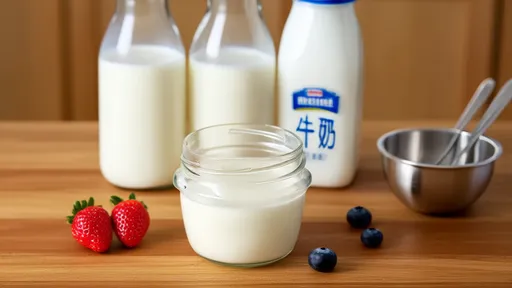
In every household, there comes a time when you open the fridge and realize the milk is nearing its expiration date. Instead of pouring it down the drain, why not transform it into something delicious and nutritious? Homemade yogurt is a fantastic way to repurpose soon-to-expire milk, turning potential waste into a creamy, probiotic-rich treat. The process is simpler than you might think, requiring minimal ingredients and equipment. Let’s dive into the easiest method to make yogurt at home using milk that’s on the verge of going bad.
The beauty of homemade yogurt lies in its simplicity. All you need is milk and a small amount of live yogurt culture, often referred to as a starter. The milk doesn’t have to be fresh; in fact, slightly aged milk works just as well, if not better, for yogurt-making. The natural fermentation process not only extends the shelf life of the milk but also enhances its nutritional profile. The result is a thick, tangy yogurt that can be enjoyed plain or customized with fruits, honey, or granola.
To begin, heat the milk gently in a saucepan until it reaches around 180°F (82°C). This step is crucial as it helps denature the proteins in the milk, ensuring a thicker consistency in the final product. Be sure to stir occasionally to prevent scorching. Once the milk reaches the desired temperature, remove it from the heat and allow it to cool to about 110°F (43°C). This is the ideal temperature for adding the yogurt starter, as higher temperatures could kill the beneficial bacteria.
Adding the starter is where the magic happens. Take a small amount of plain, unsweetened yogurt with live cultures—about two tablespoons per quart of milk—and whisk it into the cooled milk. The live bacteria in the starter will begin fermenting the lactose in the milk, converting it into lactic acid. This process gives yogurt its characteristic tang and thick texture. Once the starter is thoroughly mixed in, pour the milk into clean jars or containers and cover them with lids or cloth.
The next step is to maintain a warm environment for the milk to ferment. This can be achieved in several ways, depending on what you have available. A yogurt maker is the most convenient option, but if you don’t have one, a warm oven (turned off but with the light on), a slow cooker on the "keep warm" setting, or even a thermos can work. The goal is to keep the milk at a steady temperature of around 110°F (43°C) for 6 to 12 hours. The longer it ferments, the tangier and thicker the yogurt will become.
After the fermentation period, check the yogurt for consistency. If it’s too runny, you can strain it through a cheesecloth or coffee filter to remove excess whey, resulting in a thicker, Greek-style yogurt. Once you’re satisfied with the texture, refrigerate the yogurt for at least a few hours to halt the fermentation process and allow it to set further. Homemade yogurt can be stored in the fridge for up to two weeks, though it’s so delicious it likely won’t last that long.
One of the greatest advantages of making yogurt at home is the ability to control the ingredients. Store-bought yogurts often contain added sugars, preservatives, or artificial flavors, but your homemade version can be as pure or as creative as you like. Experiment with different types of milk—whole, skim, or even plant-based alternatives—and adjust the fermentation time to suit your taste preferences. You can also use your homemade yogurt as a starter for future batches, creating a self-sustaining cycle of deliciousness.
Beyond its culinary uses, homemade yogurt has numerous health benefits. It’s packed with probiotics, which support gut health and boost the immune system. The fermentation process also makes yogurt easier to digest for those who are lactose intolerant, as much of the lactose is broken down during fermentation. Plus, it’s a great source of protein, calcium, and other essential nutrients. By repurposing near-expiration milk into yogurt, you’re not only reducing food waste but also creating a wholesome, versatile food that can be enjoyed in countless ways.
In conclusion, turning soon-to-expire milk into homemade yogurt is a simple, rewarding process that anyone can master. With just a few basic steps and a little patience, you can transform a potential waste product into a nutritious and delicious staple. Whether you enjoy it plain, sweetened, or as a base for smoothies and dips, homemade yogurt is a testament to the ingenuity of home cooking. So next time you spot that almost-expired milk in your fridge, don’t toss it—turn it into yogurt instead.

By /Jul 24, 2025
By /Jul 24, 2025

By /Jul 24, 2025

By /Jul 24, 2025

By /Jul 24, 2025

By /Jul 24, 2025

By /Jul 24, 2025

By /Jul 24, 2025

By /Jul 24, 2025

By /Jul 24, 2025
By /Jul 24, 2025

By /Jul 24, 2025

By /Jul 24, 2025

By /Jul 24, 2025

By /Jul 24, 2025

By /Jul 24, 2025

By /Jul 24, 2025

By /Jul 24, 2025